|
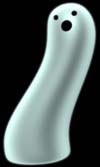
Ghosts are fun. You can have many varieties of ghosts. Ghosts can range from almost entirely human to amorphous blobs of light and shadow. It this tutorial we will create one that falls somewhere in the middle, using some interesting texturing tricks and an often over looked plug-in. Depending on your reading skills, you should easily be able to complete your ghost in less then five minutes.
|
|
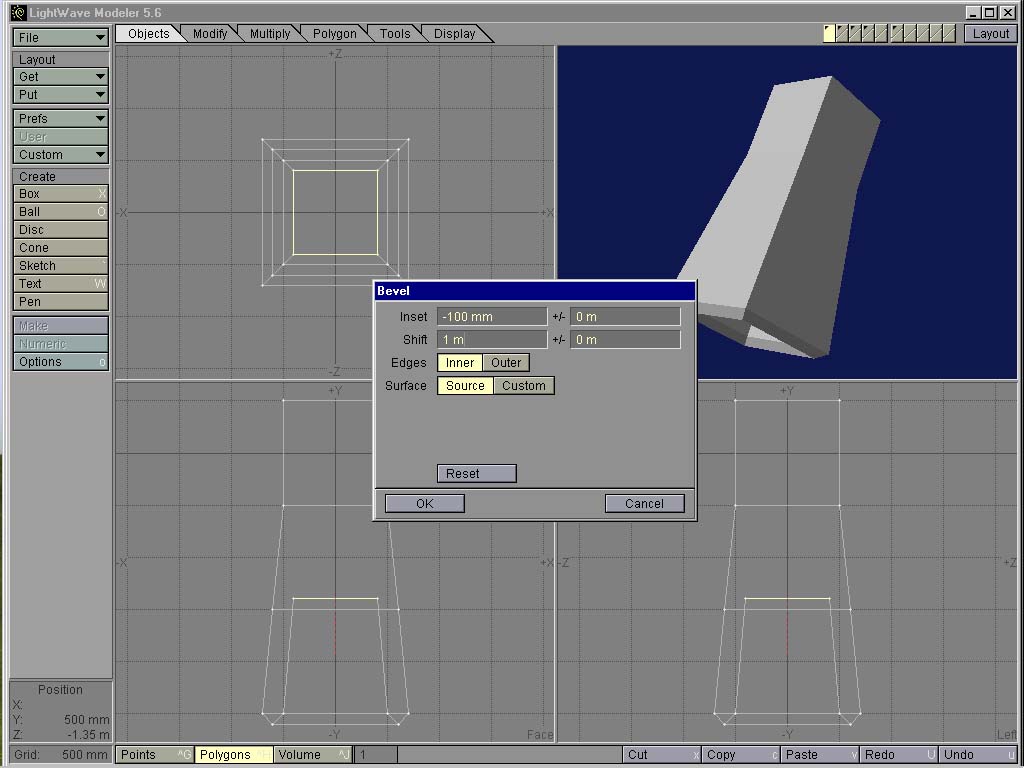 A 1-meter cube with the bottom polygon beveled several times to create the hollow cone object.  The cone object metaformed one time on the left and 3 times on the right. 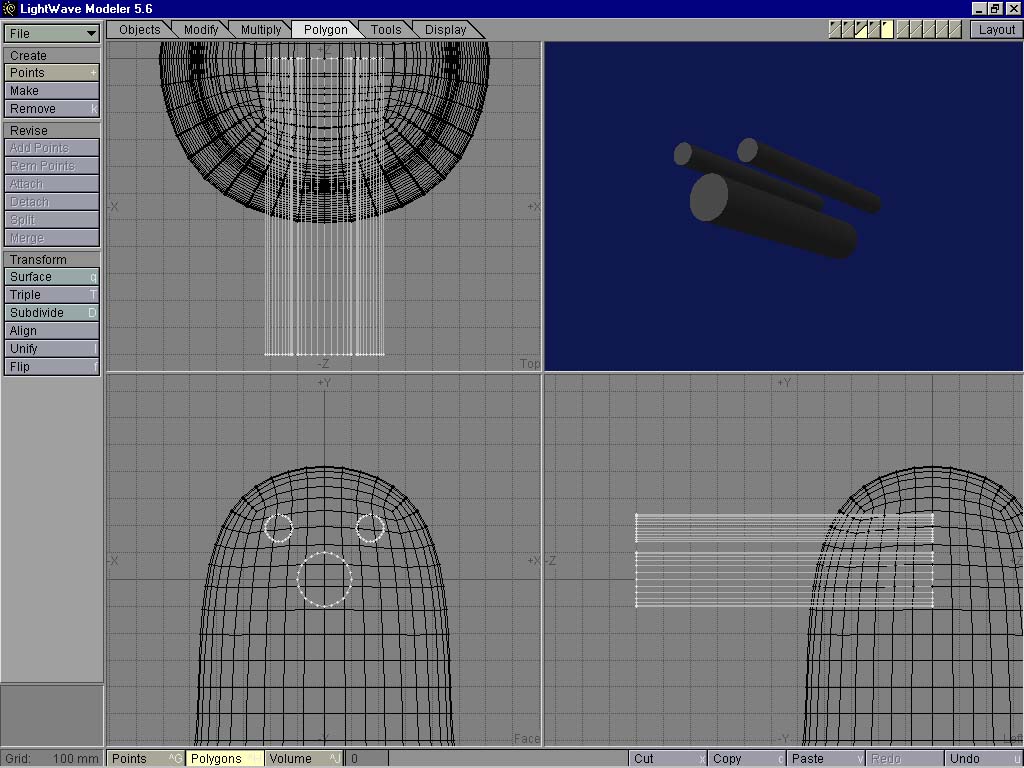 The stenciling object used to create a face pattern of polygons on the ghost head. |
Prepare to Bevel
The first step is to create the basic geometry in modeler, which we can complete, using only three tools: Make box, bevel, and metaform. Step 1: Make a 1-meter box. From the objects menu, select box. Use the default values of -500mm, -500mm, -500mm and 500mm, 500mm, 500mm. Click on OK and then hit ENTER to make the box. Step 2: Select the bottom polygon of the box and bevel the basic shape of the Ghost. With the bottom polygon selected, hit the Ĺbĺ key to bring up the bevel box. Set the bevel inset to -100mm, so that it flares outward when it bevels, and set the shift amount to 1 meter. Bevel the polygon twice with these same values. Bevel once again but change the values to 100mm inset and 100mm shift for a more conventional bevel. Bevel again with a 100mm inset but a -100mm shift so that you have a nice lip on the bottom. One final bevel with a 100mm inset and a -1 meter shift gives the object a nice skirt. That is all for beveling. You should have an object that looks vaguely like a tall boxy shuttlecock. Step 3: Make the object smooth. Go to the polygon menu and select Subdivide. In the Subdivide polygons option box select Metaform and make sure the maximum smoothing angle is set at 179.0 degrees. Apply Metaform to the entire object three times. This gives you a reasonably smooth Popsicle shaped object. Click on the Surface button and name all the polygons ĹGhostĺ and save the object. |
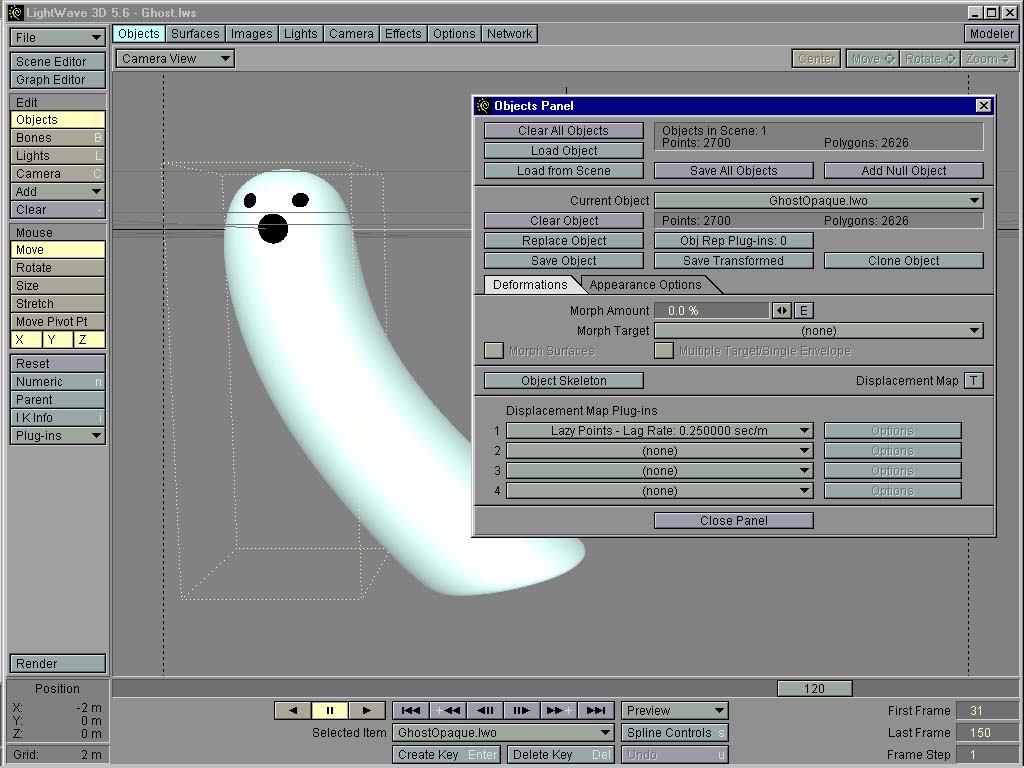 Ghost object in layout with LazyPoints applied, causing its backend to sway. |
Making Ghost Moves
As we all know, Ghosts are spooky. They float around in a scary way. Computers like to move things around in a very straightforward mechanical way. There is a plug-in that does a nice job in adding an organic ghostly motion that we will use called Lazy Points. Step 4: Load the Ghost object and keyframe it moving across the screen. In layout, load the ghost and keyframe it on the left side of the screen at frame Ĺ0ĺ and frame Ĺ60ĺ. At frame Ĺ30ĺ keyframe the ghost at on the right side. A 60-frame test wireframe should show the ghost bouncing back and forth very stiffly across the screen. |
 Some texture examples for the ghost surface using various types of edge transparency |
Painting a ghost
According to government regulations covering the texturing of ghosts, you have two choices. You can have fuzzy edges with hard centers or hard shells with translucent middles. Both texture choices have some attributes in common: Color: The color is your choice, though I suggest an almost white color with a slight blue or green tint. Diffusion and Luminosity should both be at 50%. Turn on smoothing. Turn on Glow in the advanced options in the surfaces panel and in the effects panel activate the Enable Glow Effects option with a glow intensity of 50% and a glow radius of 10 pixels. For the fuzzy edge Ghost look. Using the settings above, go to the advance options of the surfacing panel and set the edge transparency to Transparent with an Edge Threshold of 1.0. This results in a more amorphous type of ghost. For the hard shell ghost, set the Edge Transparency to Opaque with an Edge Threshold 1.0. To give the ghost a bit more substance set the Specularty level to P with Color Highlights turned on and a low Glossiness level of 16. These settings result in an almost x-ray type look for the ghost object. This is your basic ghost object, its movement, and its basic texture. If you want to athropormorphis your ectoplasm a bit more you can take another step and add a face. |

|
Product Info |
Ordering Info |
Support and Downloads |
Articles and Tutorials |
LightWave Mailing List Contest |
Mailing List Archives & Info |
LightWave Mailing List FAQ |
Other Interesting Web Sites |
