This is the second part of the Studio setup tutorial - I just renamed it as we are actually on location...
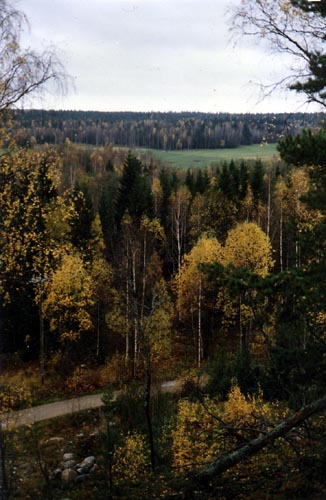
Here's a random shot I dug up from my archives - It's taken back in the good old days, when i actually did have time to shoot stills, and go out in the woods occasionally...
I scanned it at 1500 pixels resolution, so the original is relatively high rez.
In this first part we will create a scene in which we use this still hirez photo as a background for a highly reflective (Chrome-like) space craft hovering above the woods.
Umm... craft - let's quickly create one in the modeler!
If you are not interested in the modeling part, just hop straight to part 2, and get the needed objects from the zip file.
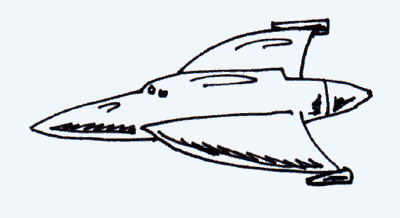
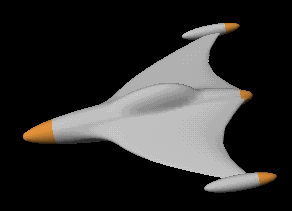
Here's a superfast concept sketch of the model:
LOL - well, it's got some Flash Gordonish style, doesn't it ;-)
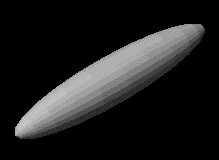
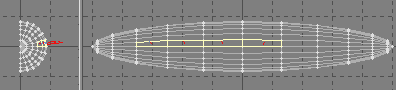
The basic cigar like shape first:
Create a Default 1 m. ball in modeler, and rotate it 90° in X axis
You can use either the rotate numeric panel, or just press [r] in the "Left" window.
Center the object.
Now stretch it 500% in the Z axis. What you have should look like this:
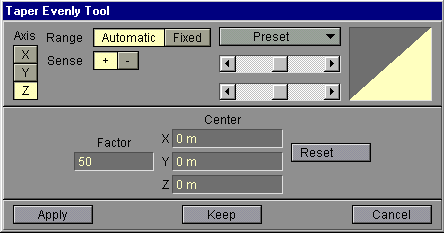
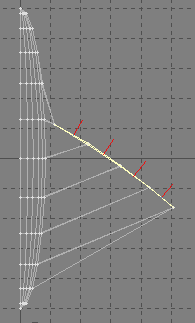
Then use bevel taper1 with these settings:
One end of the model looks more sharpy-pointy now. Now just rotate the object 180° in the Y axis and apply taper again. The hull shape is quite ready now. It's a bit thin, so let's scale it 150% In both X and Y.
Center object. (Objects>custom>LW_center)
Delete the Left half of the object (X-) with volume tool. You may have to delete some of the polygons manually.
Now select some polygons for the wings:
Use the rotate tool in top view to pull out the polys.
Deselect.
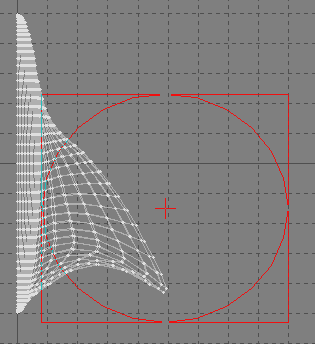
Convert the object to Metanurbs [tab] and freeze it. Then use magnet tool with spike preset (Set it in the magnet numeric [n] panel) to drag the tip of the wing to a correct place:
Next model "Fuel tanks" to the tip of the wings with ball tool (Do the 90° rotate thingy for them too - that way surfacing will be easier.) Multiply>Mirror the object in X axis, merge points.
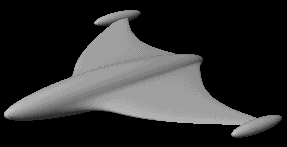
Well, It's starting to take shape. Now just model a small bulge for the cockpit with the Magnet too. (Change it to dome preset) Give the object a surface name, like Craft01 or something.
Now select the nose of the craft, and some polys from the fuel tanks and give them surface Craft 02:
It's good enough for our purposes. It doesn't
actually look like the concept sketch, but since I'm the art director here
today, the model is now accepted ;-)
Save the object as Craft01.
Clear modeler.
Since we are in the modeler, let's create some polys to map our BG image to. (It will actually be the foreground also.)
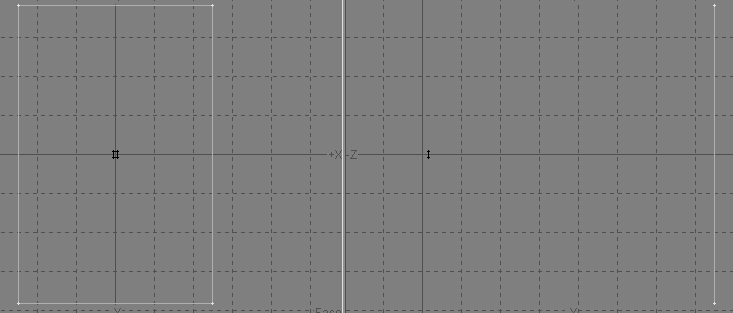
It's size is 1149*1761 pixels (included in the scene zip), which gives us roughly 1.53 aspect ratio for the image. So, let's create a centered box that is 1.53 m. in the Y, and 1 m. in X, 0 in Z.
We will keep our camera strictly at 0,0,0, so let's move the object to 1.5m. in Z.
Give it surface "FG".
Copy the object to another layer. Scale it 5000%. Give it surface "BG".
What you have should look like this:
Save the layers as Woods_BG.lwo and Woods_FG.lwo.
Now we can quit this modeling stuff.

|
Product Info |
Ordering Info |
Support and Downloads |
Articles and Tutorials |
LightWave Mailing List Contest |
Mailing List Archives & Info |
LightWave Mailing List FAQ |
Other Interesting Web Sites |
